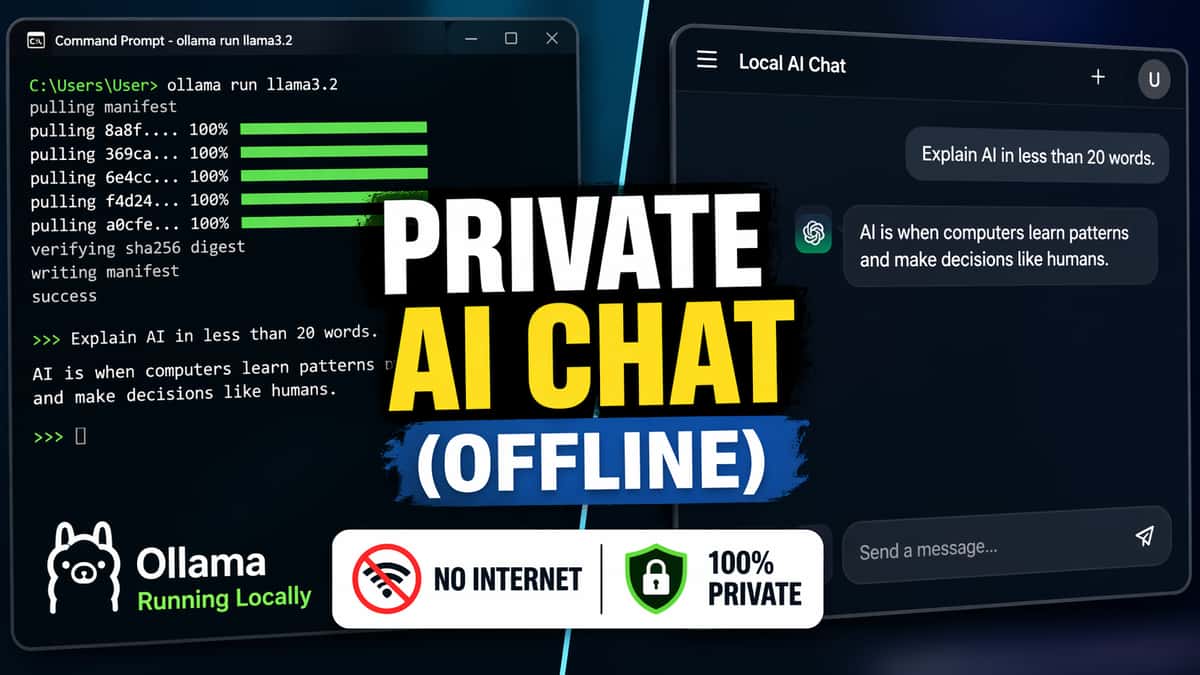
As AI adoption grows, understanding how to run a private AI chat locally is becoming essential.
AI went mainstream around 2023 when ChatGPT hit 100 million users within months. By 2025, it’s everywhere, with over 78% of organizations and hundreds of millions of people using AI tools for work and personal tasks.
But as usage grows, so do concerns. Around 84% of people worry their data could become public.
This guide shows you—step by step—how to run a private AI chat locally on your own computer, so everything stays offline and fully under your control.
This is the second part of the beginner’s guide series.
Read part 1: How to use AI: The 3 Practical Purposes of Generative AI
Read part 3: Prompt Building: Master the Art of Talking to AI
Read part 4: Create Your Own AI Assistant: Customizing for Productivity
Advantages of Running a Private AI Chat
If you’re exploring how to run a private AI chat locally, there are several advantages beyond data privacy:
- Free — Runs locally with no subscription or usage limits
- Offline — Works without internet access
- Customizable — Choose models, adjust parameters, fine-tune behavior
However, this comes with trade-offs:
- Setup time — Initial installation and model download can take time
- Hardware limits — Performance depends on your PC specs
Alternative
Setting up local AI takes time and technical effort. If you prefer a faster, simpler approach, consider these options:
- Cloud tools with privacy controls — Tools like ChatGPT or Claude allow disabling chat history or opting out of training
- Managed model platforms — Services like Hugging Face or Replicate let you run models without complex setup
These options are faster to start and easier to maintain but are not fully private.
If you don’t mind the trade-off and want full privacy, continue below.
Tools used
To run AI locally, you only need these three free tools:
- Ollama — allows AI models to run locally
- Docker (Optional) — simplifies running the chat interface
- Open WebUI (Optional) — a simple web-based chat UI (ChatGPT-like)
The steps below show how to install and run each of the tools.
Requirements
You can set up local AI on Windows, macOS, or Linux. Here, we’ll focus on setting up local AI on Windows. You’ll need a Windows PC (Windows 10 or later) with the following:
- RAM — Minimum 16GB (depending on your chosen AI model size)
- Storage — Several GBs available for models
- GPU (Optional) — Improves performance but not required
- Internet connection — Only for installation and model download
If you have these, let’s proceed with the step-by-step installation.
Step-by-Step Installation
This section shows how to run a private AI chat locally on your computer.
Step 1 – Install Ollama
A.
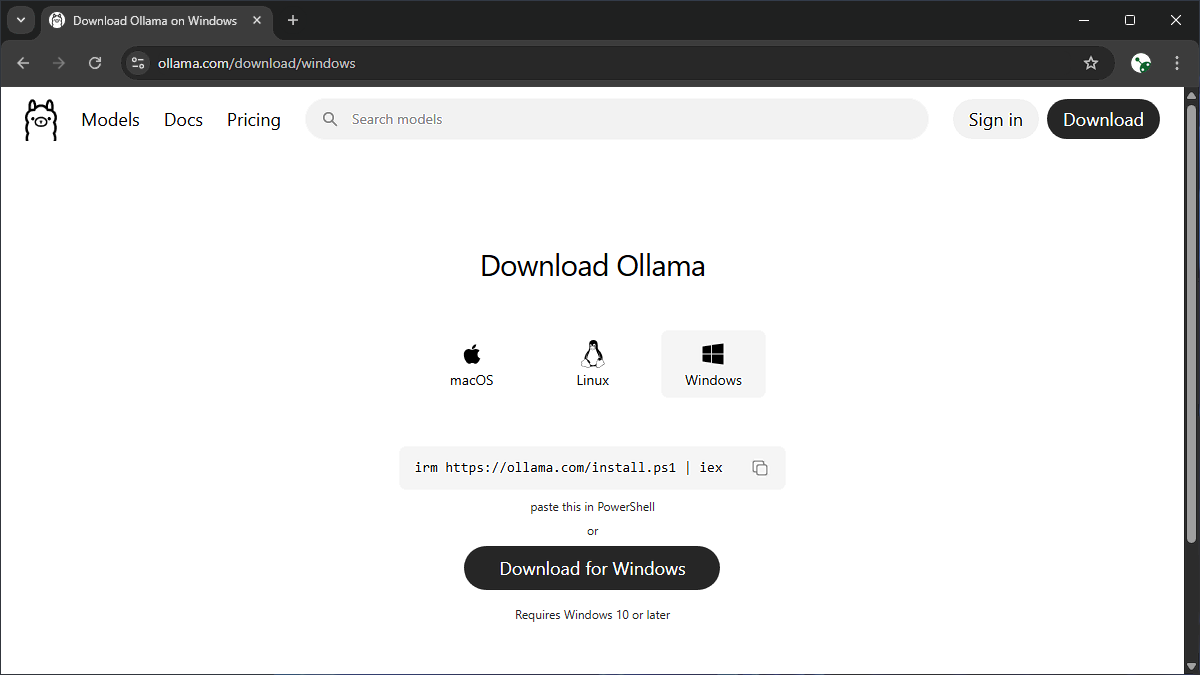
Download Ollama for Windows from ollama.com/download/windows.
B.
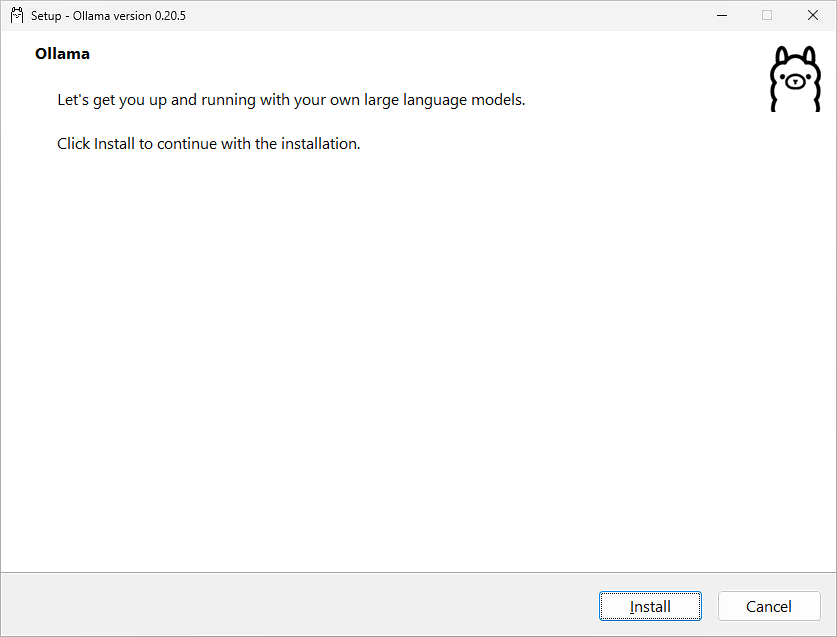
Run the installer (OllamaSetup.exe) like a normal app.
C.
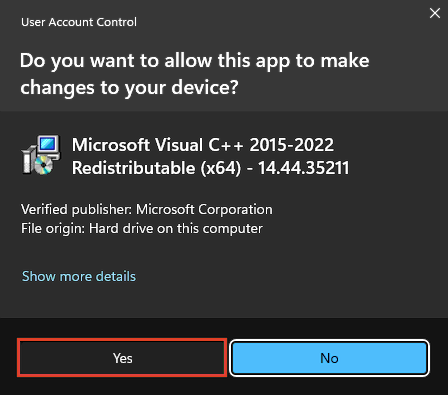
Click Yes to allow Microsoft Visual C++ Redistributable to be installed if you don’t have one.
D.
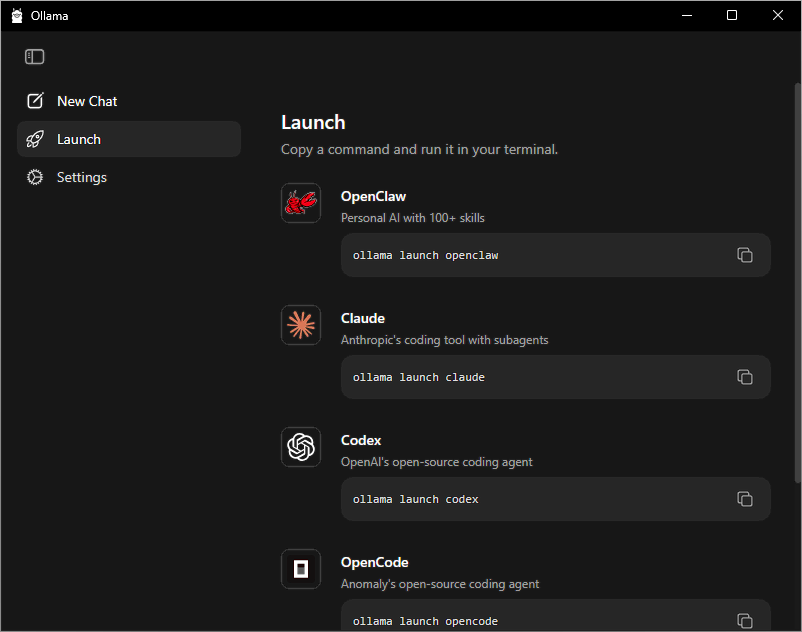
If you see the Ollama window after installation, your installation is successful. You will see an Ollama icon in the System Tray (near the clock)—means it’s up and running. Leave it running.
Ollama handles model download, runtime, and execution in one tool.
Step 2 – Download a Model
Before you can use Ollama, you need to download a model. You can select a model from the Ollama’s drop down list, however, the options are rather limited. Download the model from Ollama website instead.
A.
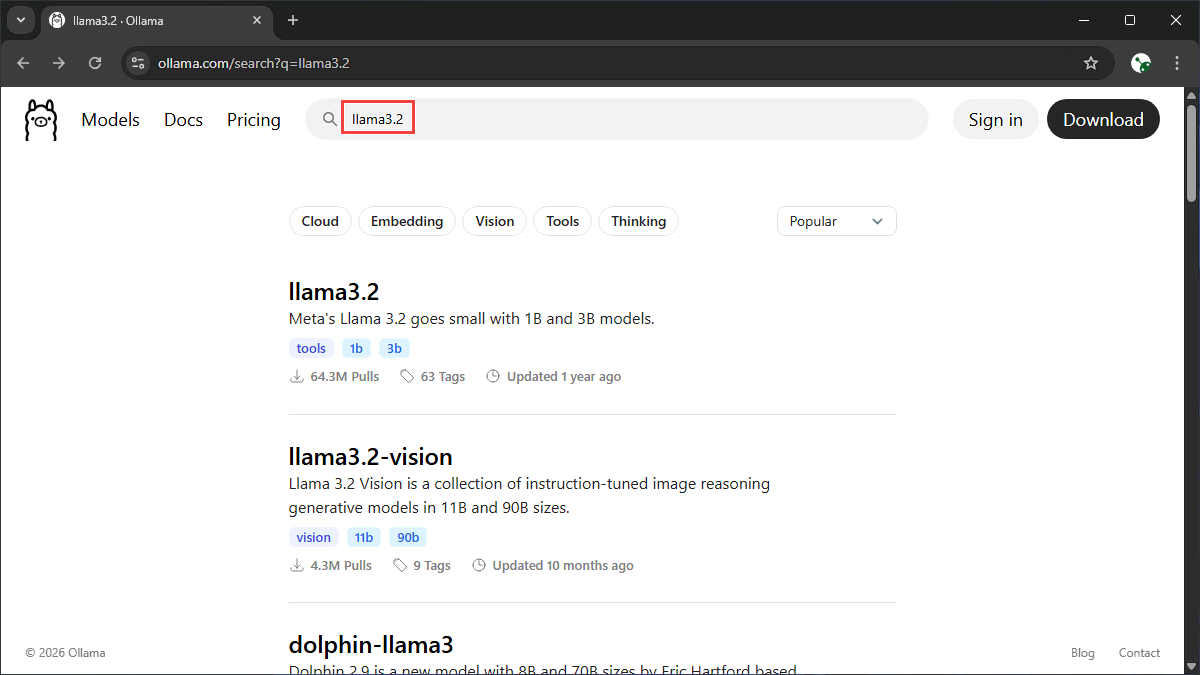
Go to ollama.com/library. Here we’ll download the Llama 3.2 model. Type in the Search models bar:
Browser
llama3.2then hit Enter.
B.
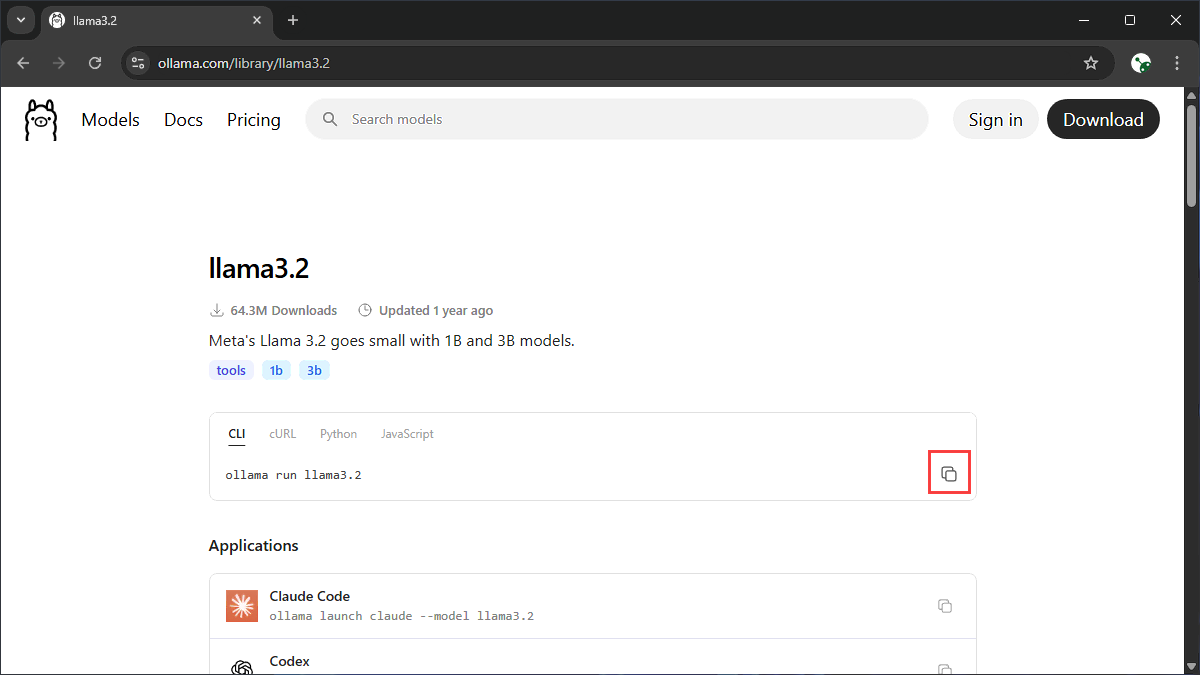
Click the llama3.2 model and copy the “run” command.
C.
Paste it into your Command Prompt:
Command Prompt
ollama run llama3.2and hit Enter.
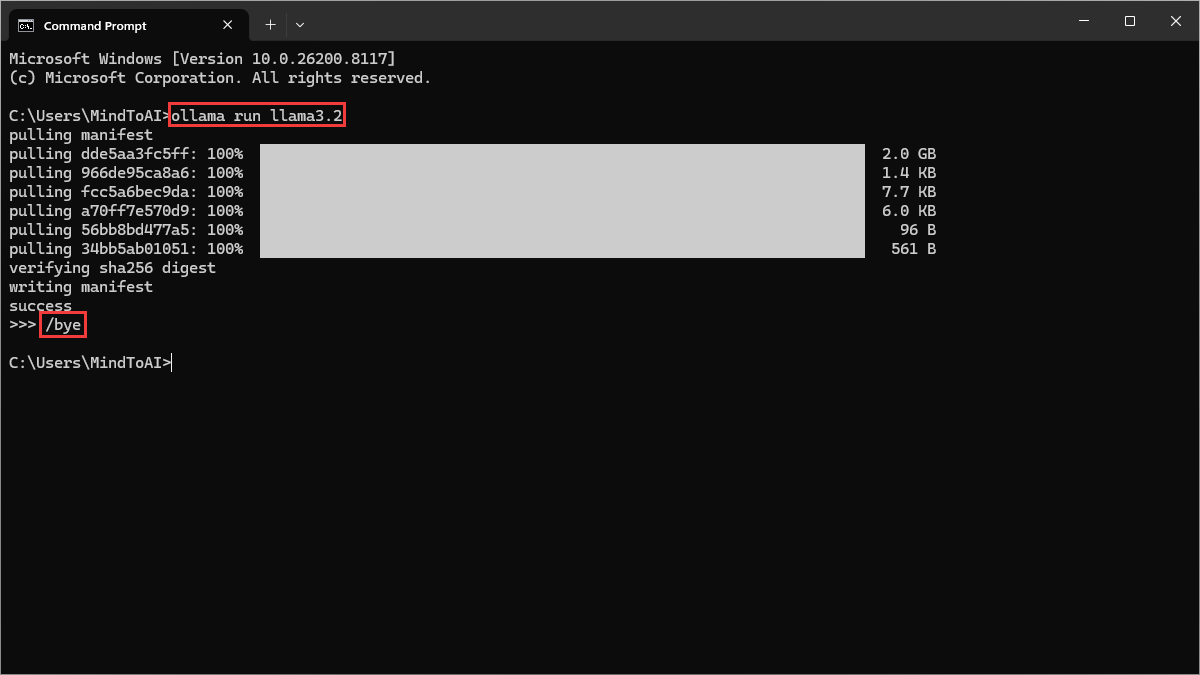
This downloads and starts the Ollama with the Llama 3.2 model automatically. The first run may take a few minutes depending on your internet speed.
Tip: You can cancel the download anytime and try a smaller model if it’s too slow.
D.
Close the Ollama session with Ctrl + D or type:
Command Prompt
/byeand hit Enter, then close the Command Prompt.
This will only close the Ollama session on the Command Prompt. Ollama still runs as long as you see the icon in the System Tray. Leave it running.
You now have a working local AI ready to generate responses offline. Let’s test it.
Step 3 – Test Prompt
A.
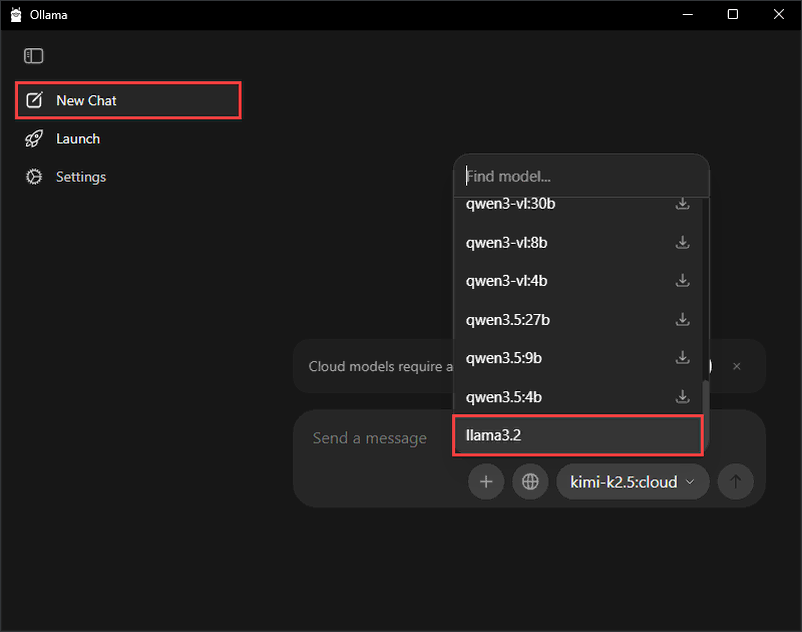
Go back to your Ollama window, click on New Chat (or click Open Ollama on the Ollama icon in the System Tray if you have closed it), and select llama3.2 from the model list.
B.
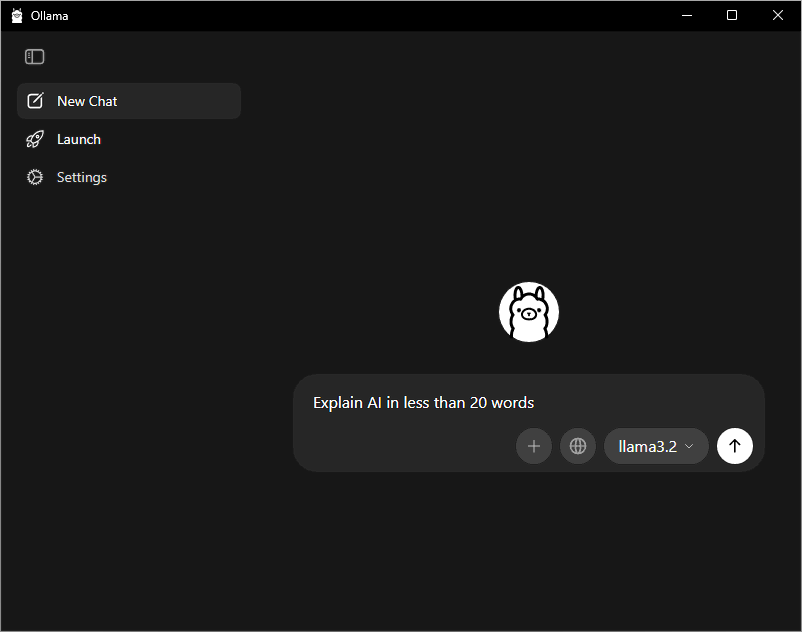
Type this prompt:
Ollama
Explain AI in less than 20 wordsthen hit Enter.
C.
You should receive a response back.
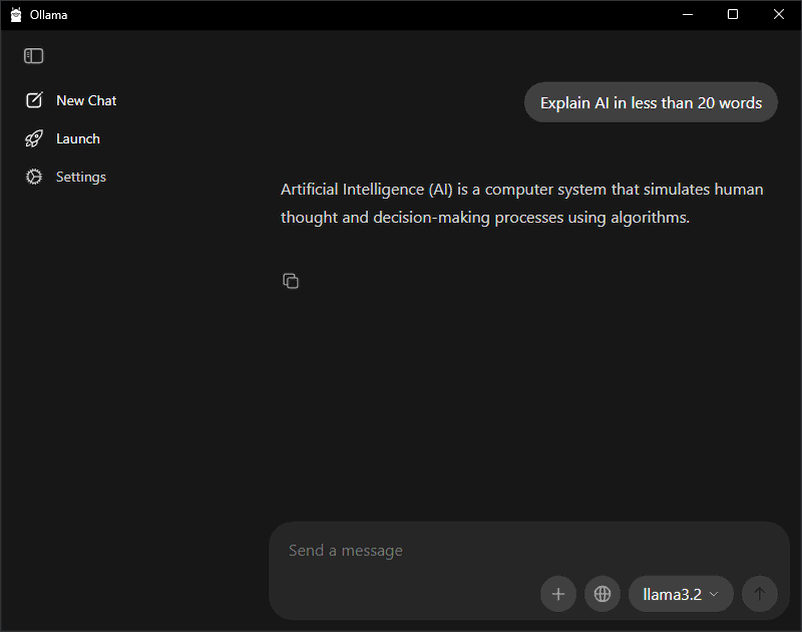
You now have a local AI setup in your computer and can already start using it.
You’ve just completed the core setup. Everything below is optional.
Optional Web Interface
If you want a local AI with more user-friendly web interface, follow these additional steps to install Docker and Open WebUI.
Step 4 – Install Docker
A.
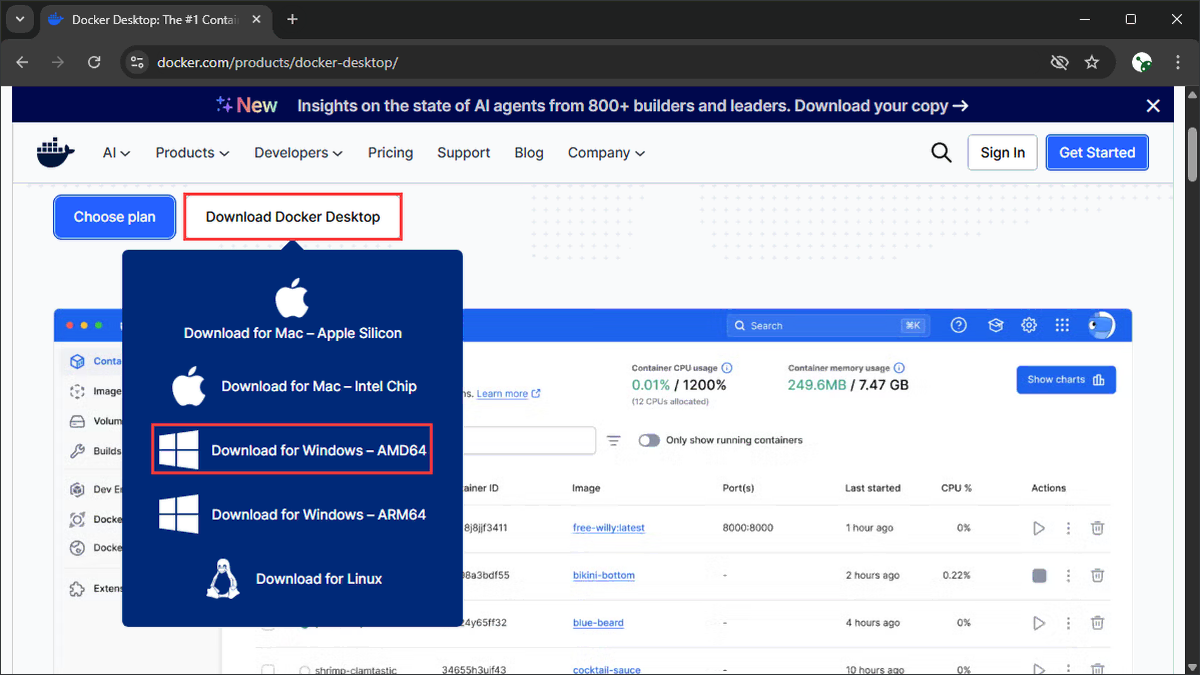
Download Docker Desktop from docker.com/products/docker-desktop/. Choose Download for Windows – AMD64.
B.
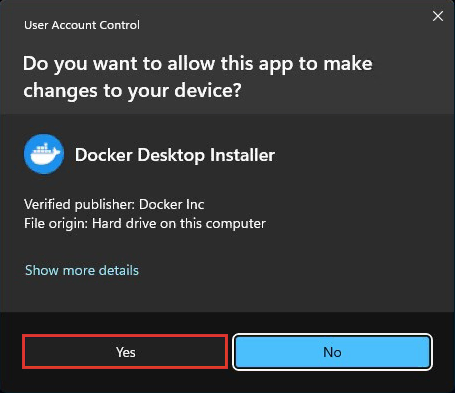
Run the installer (Docker Desktop Installer.exe). Click Yes if it asks you to allow the installer to make changes.
C.
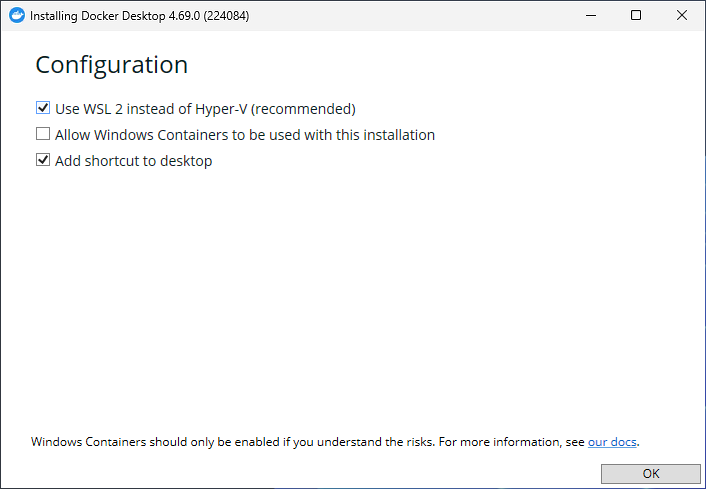
Keep default options (Use WSL 2 instead of Hyper-V). Restart Windows when asked to complete the installation.
D.
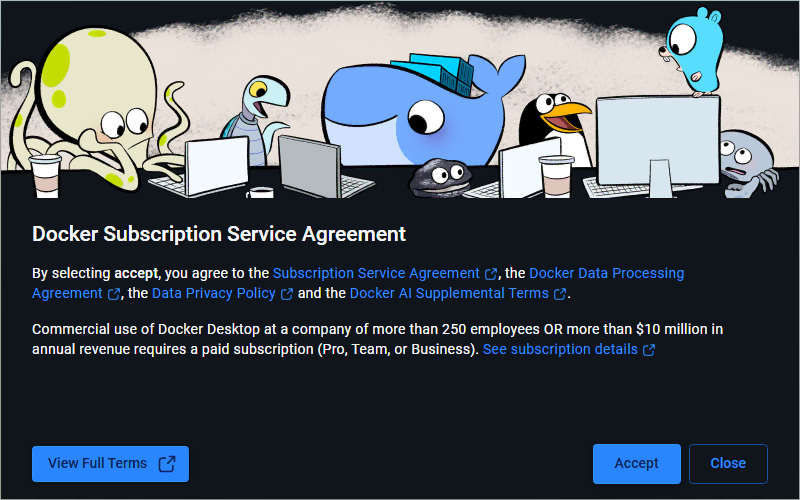
Open the Docker Desktop. Accept the Docker Subscription Service Agreement to continue.
E.
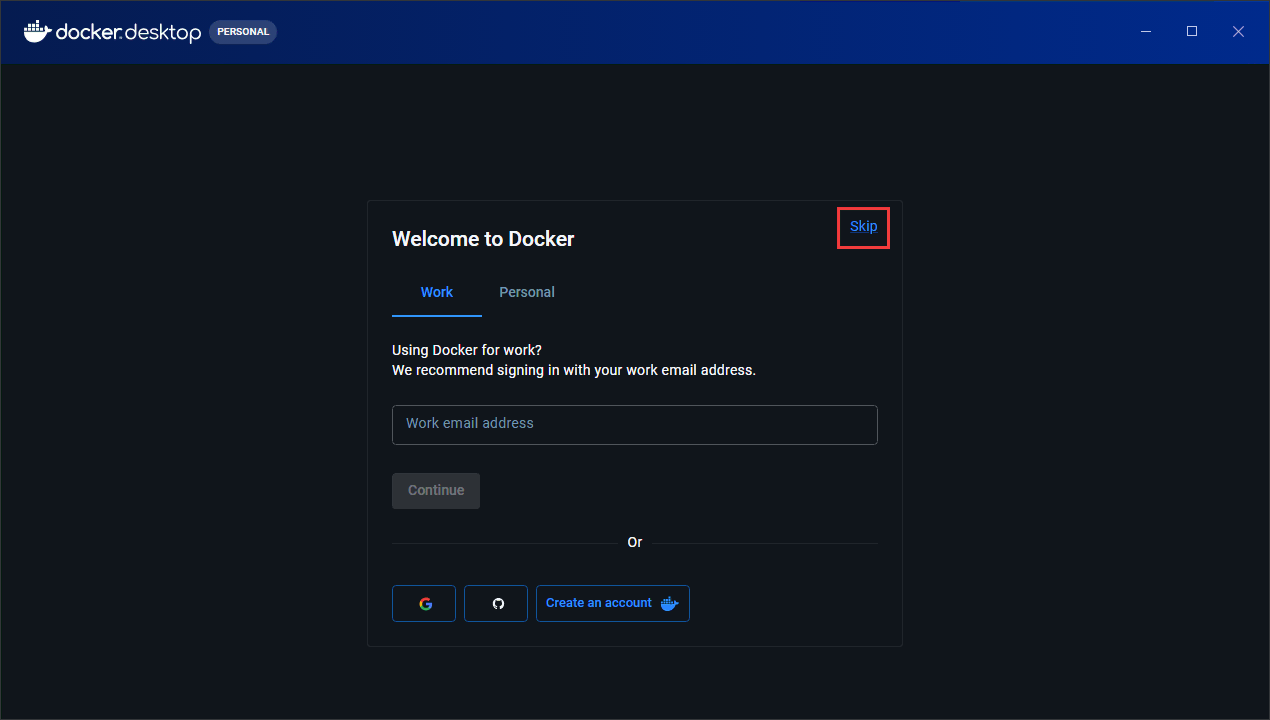
Skip the signing-in process.
F.
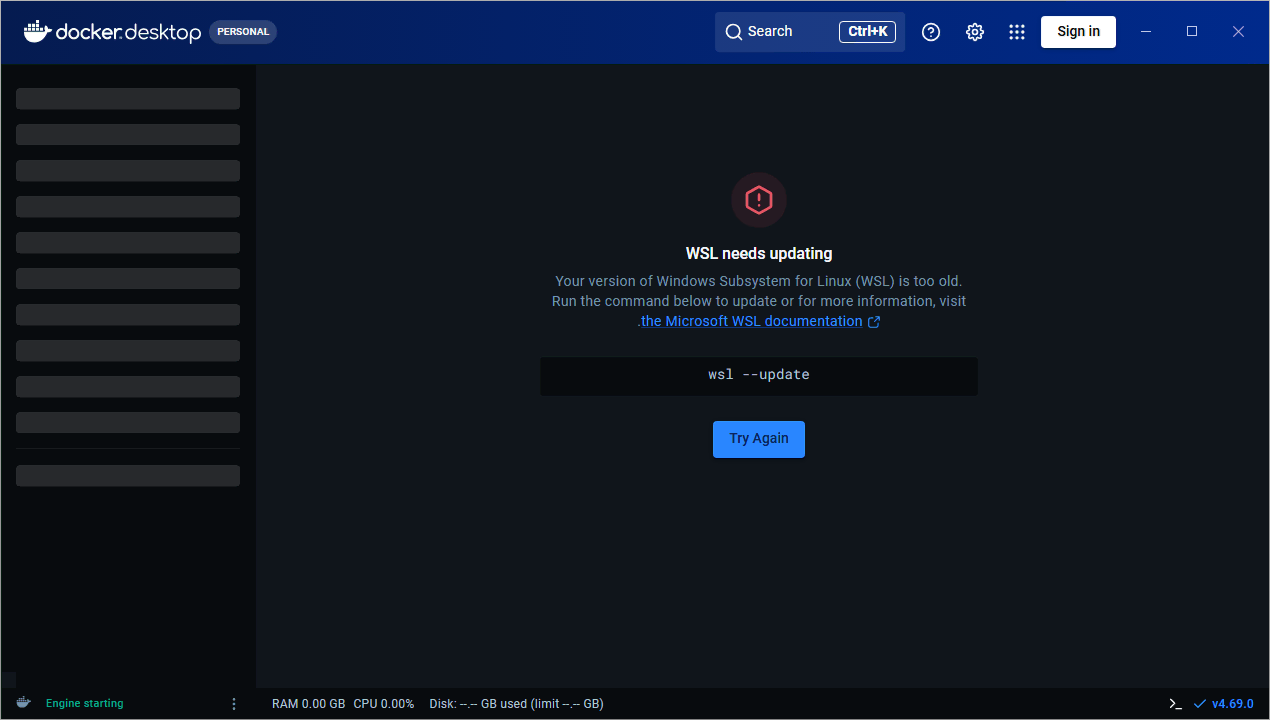
Click Try Again when Docker Desktop displays an alert that WSL needs updating. It will open a Terminal window.
G.
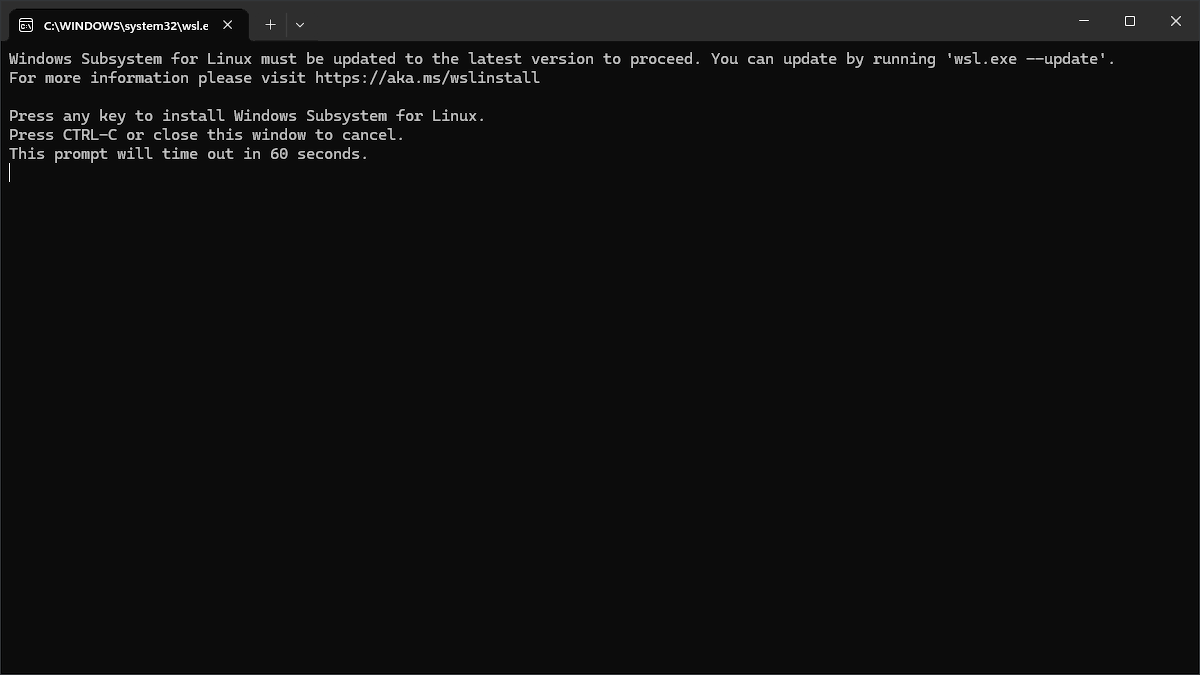
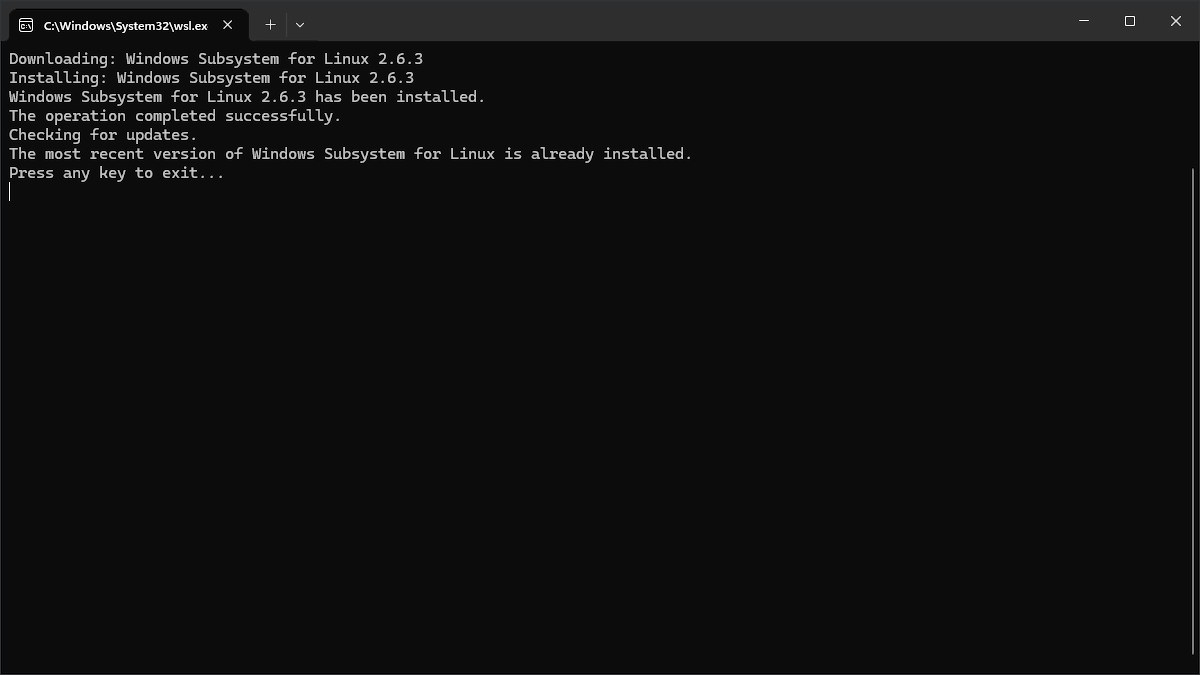
Press any key in the Terminal window to start the WSL update process.
H.
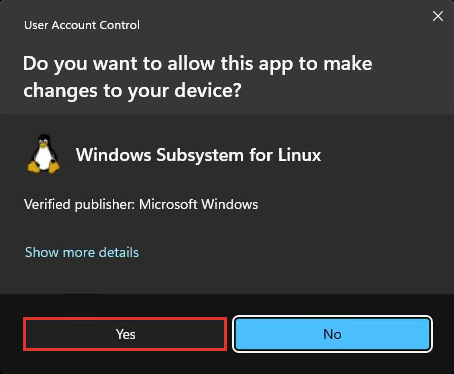
Click Yes if it asks you to allow the installer to make changes.
I.
Wait until the process is completed then press any key to close the Terminal window.
J.
Restart Docker Desktop. If you see the Engine running status at the bottom left corner of the Docker Desktop window, your installation is successful.
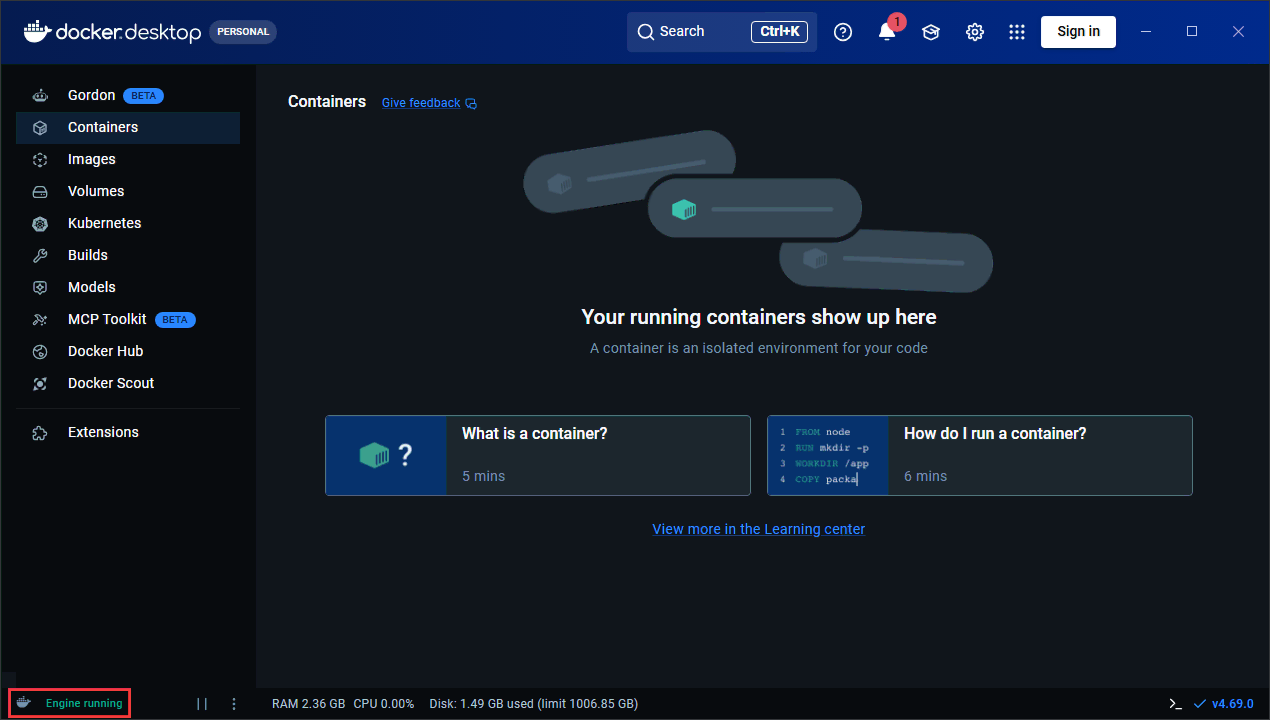
Docker simplifies running apps like Open WebUI without manual dependency setup. Continue with the next step to add the Open WebUI.
Step 5 – Add UI: Open WebUI
A.
Ensure Ollama is still running then paste the following command into your Command Prompt:
Command Prompt
docker run -d -p 3000:8080 --add-host=host.docker.internal:host-gateway -v open-webui:/app/backend/data --restart always --name open-webui ghcr.io/open-webui/open-webui:mainand hit Enter.
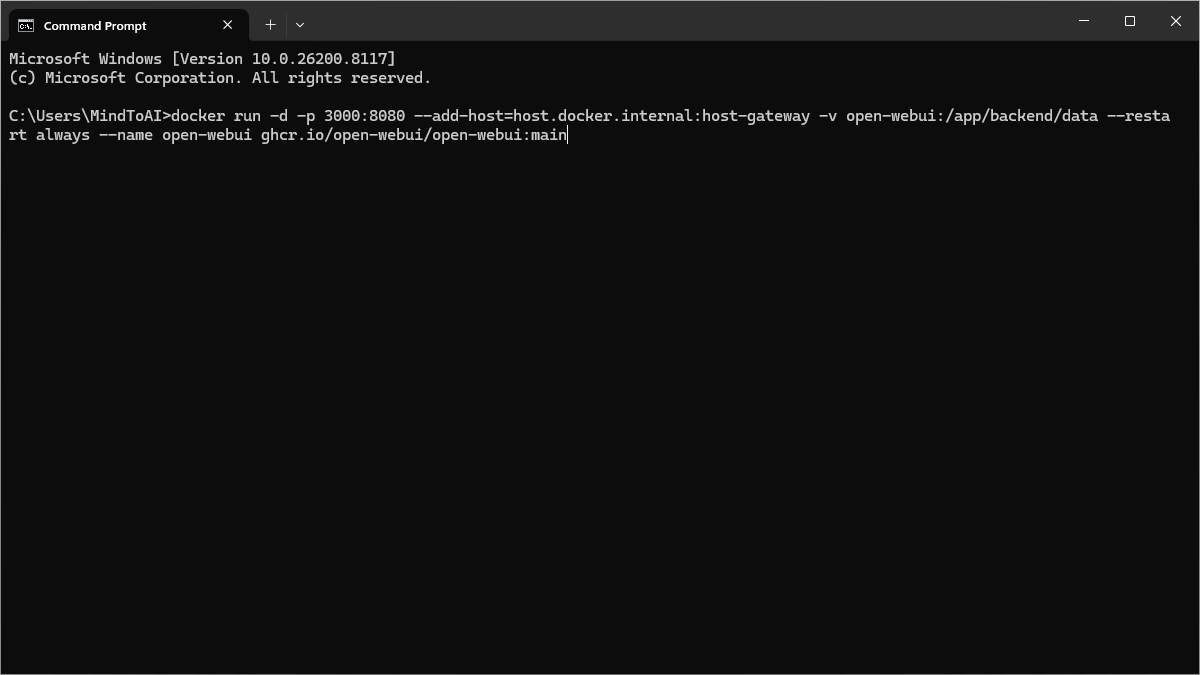
This command will Install Open WebUI in docker with the following options:
-d : Runs the app in the background so you can close the Command Prompt
-p 3000:8080 : Maps the app to your web browser at port 3000
–add-host : Allows Docker to “talk” to the Ollama engine on your host
-v : Keeps chat history in Docker volume
–restart always : Runs Open WebUI as soon as Docker Desktop loads
B.
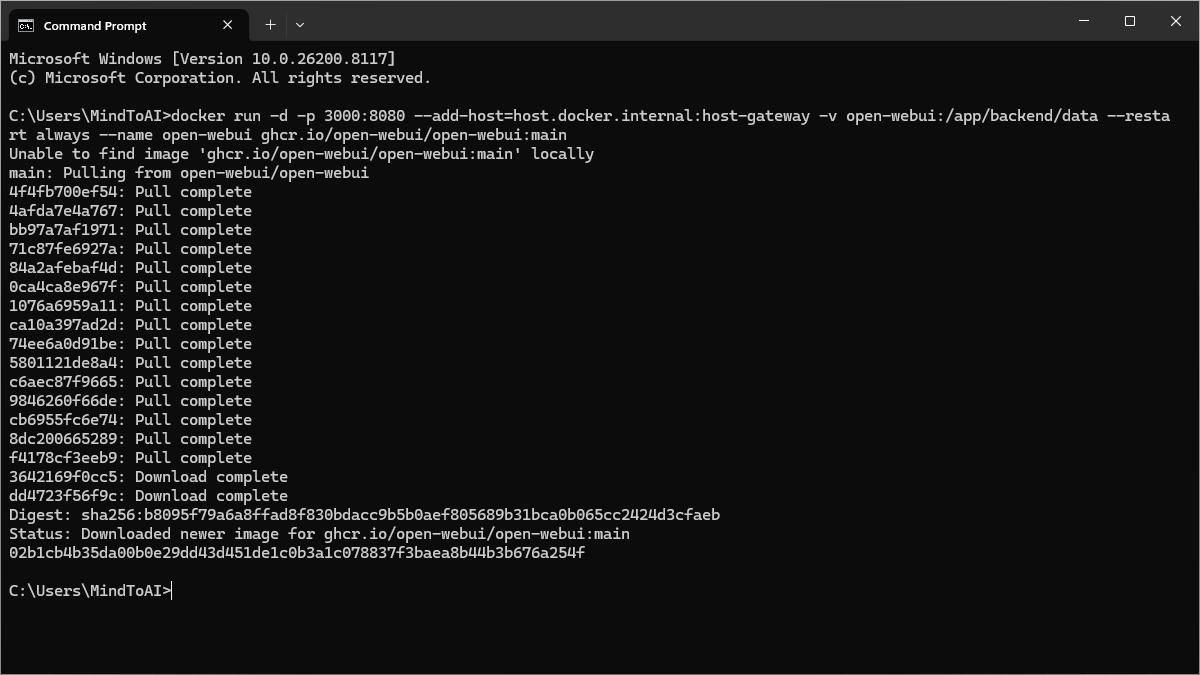
Wait until Docker completes the Open WebUI download and installation. Depending on your internet speed, this may take a while.
C.
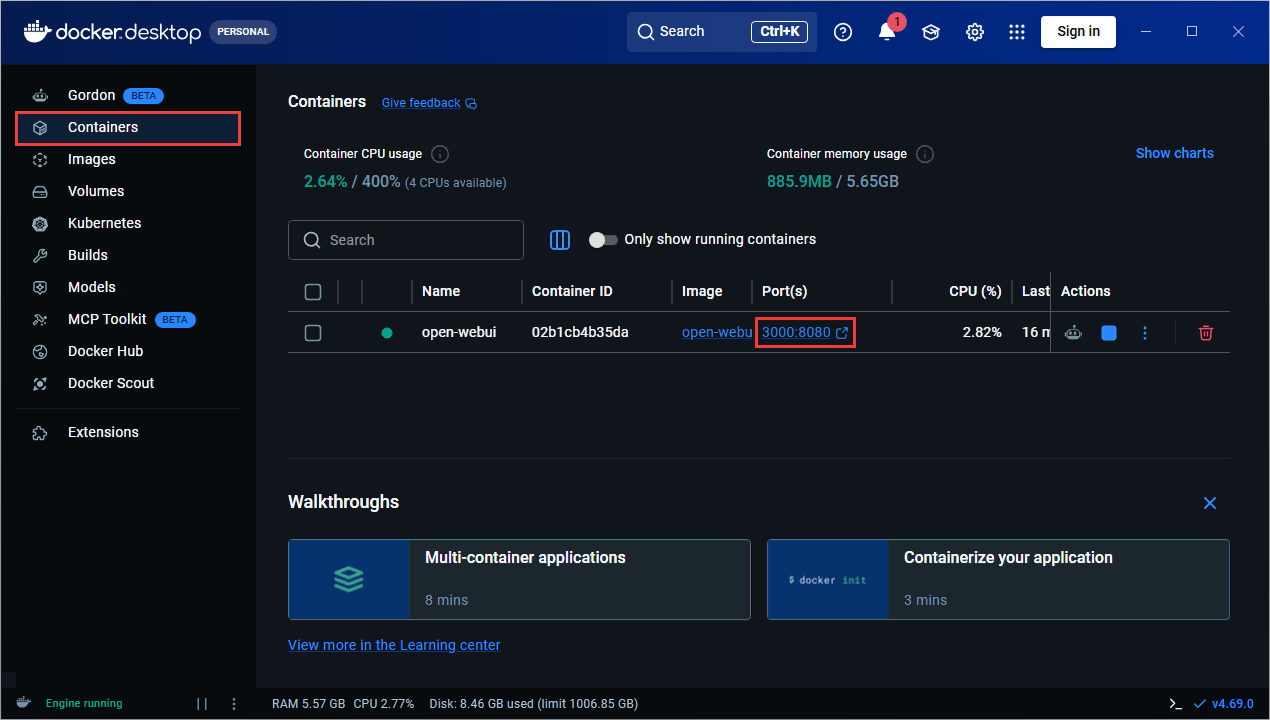
Go back to your Docker Desktop window (or click on the Docker Desktop icon in the System Tray if you have closed it). You should now see open-webui in Docker Containers.
Click on the ports to open the Open WebUI (or open http://localhost:3000/ in your browser).
D.
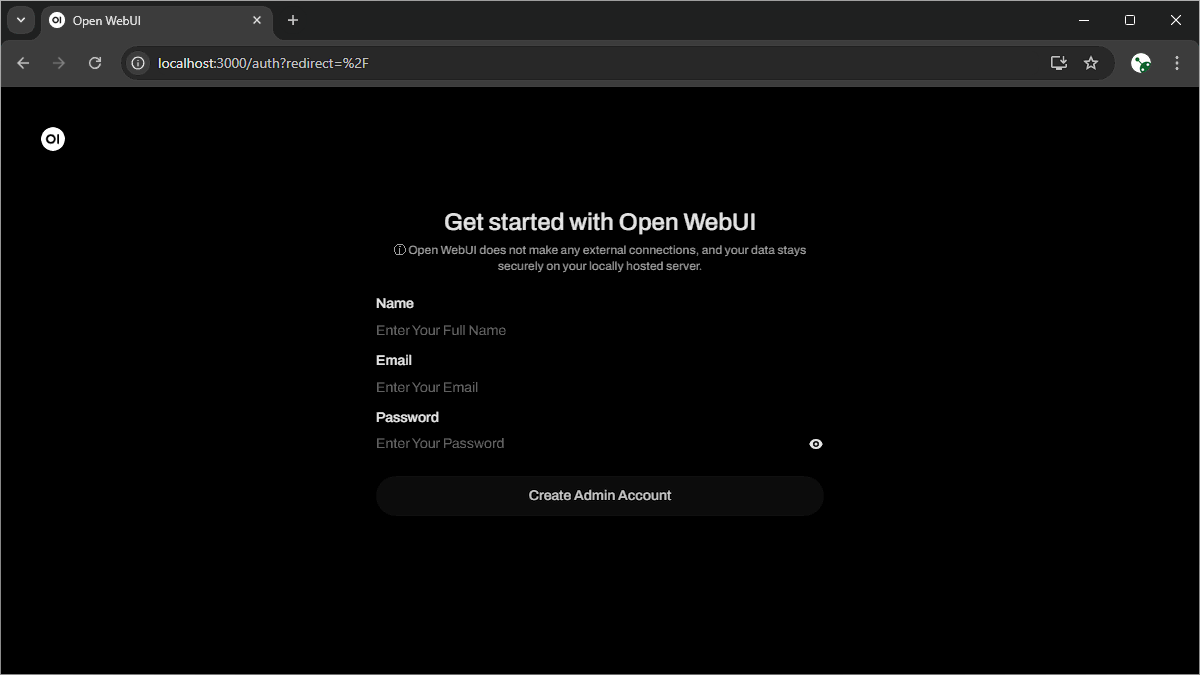
Click on the Get started arrow and enter your Name, Email and Password (note down your Password for future login). This info is only used to create a local admin account on your local PC. No data is sent to the Open WebUI server.
E.
If you see the Open WebUI window afterwards, your installation is successful. Type a prompt then hit Enter, you should get a response.
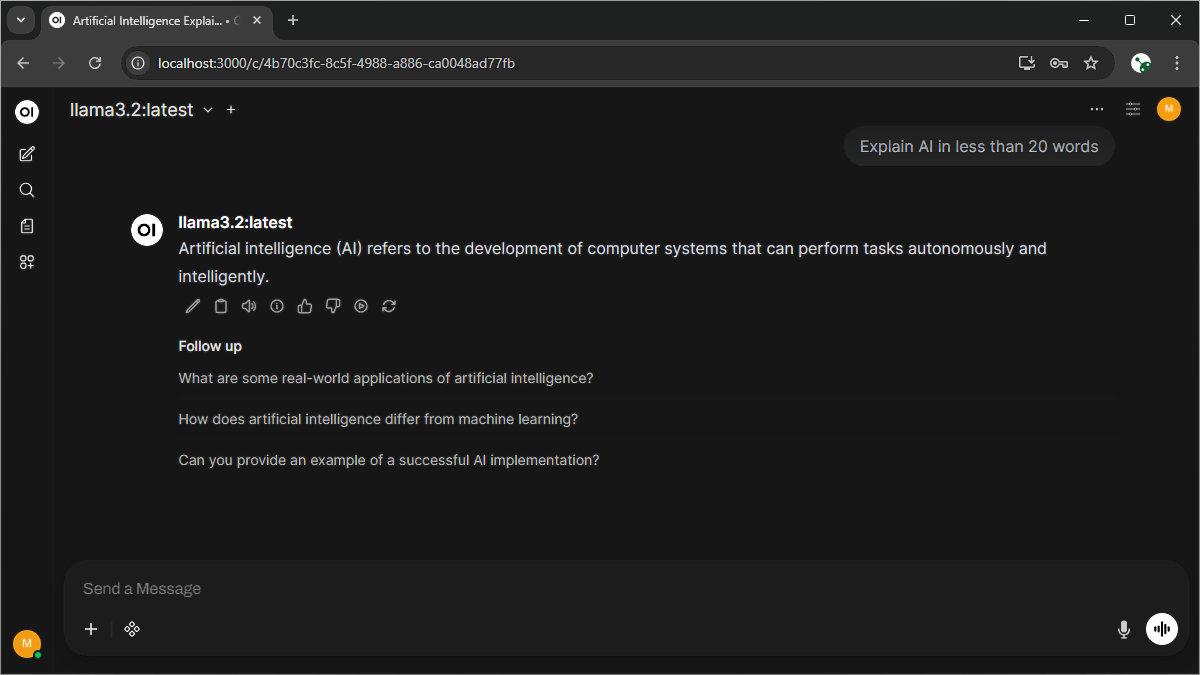
You now have a clean, browser-based interface for daily AI use. If you want to customize your local AI setup, continue below.
Basic Customization
Here are some basic customizations you can try.
Step 6 – Switch Model
Try different models based on your needs.
A.
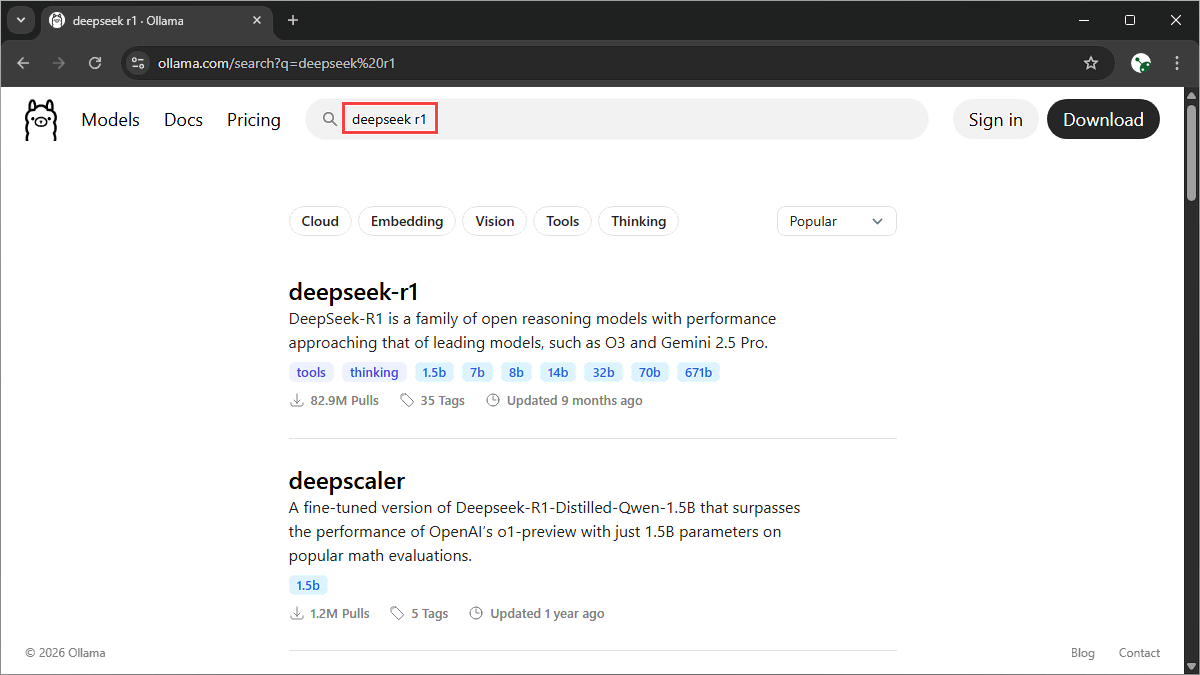
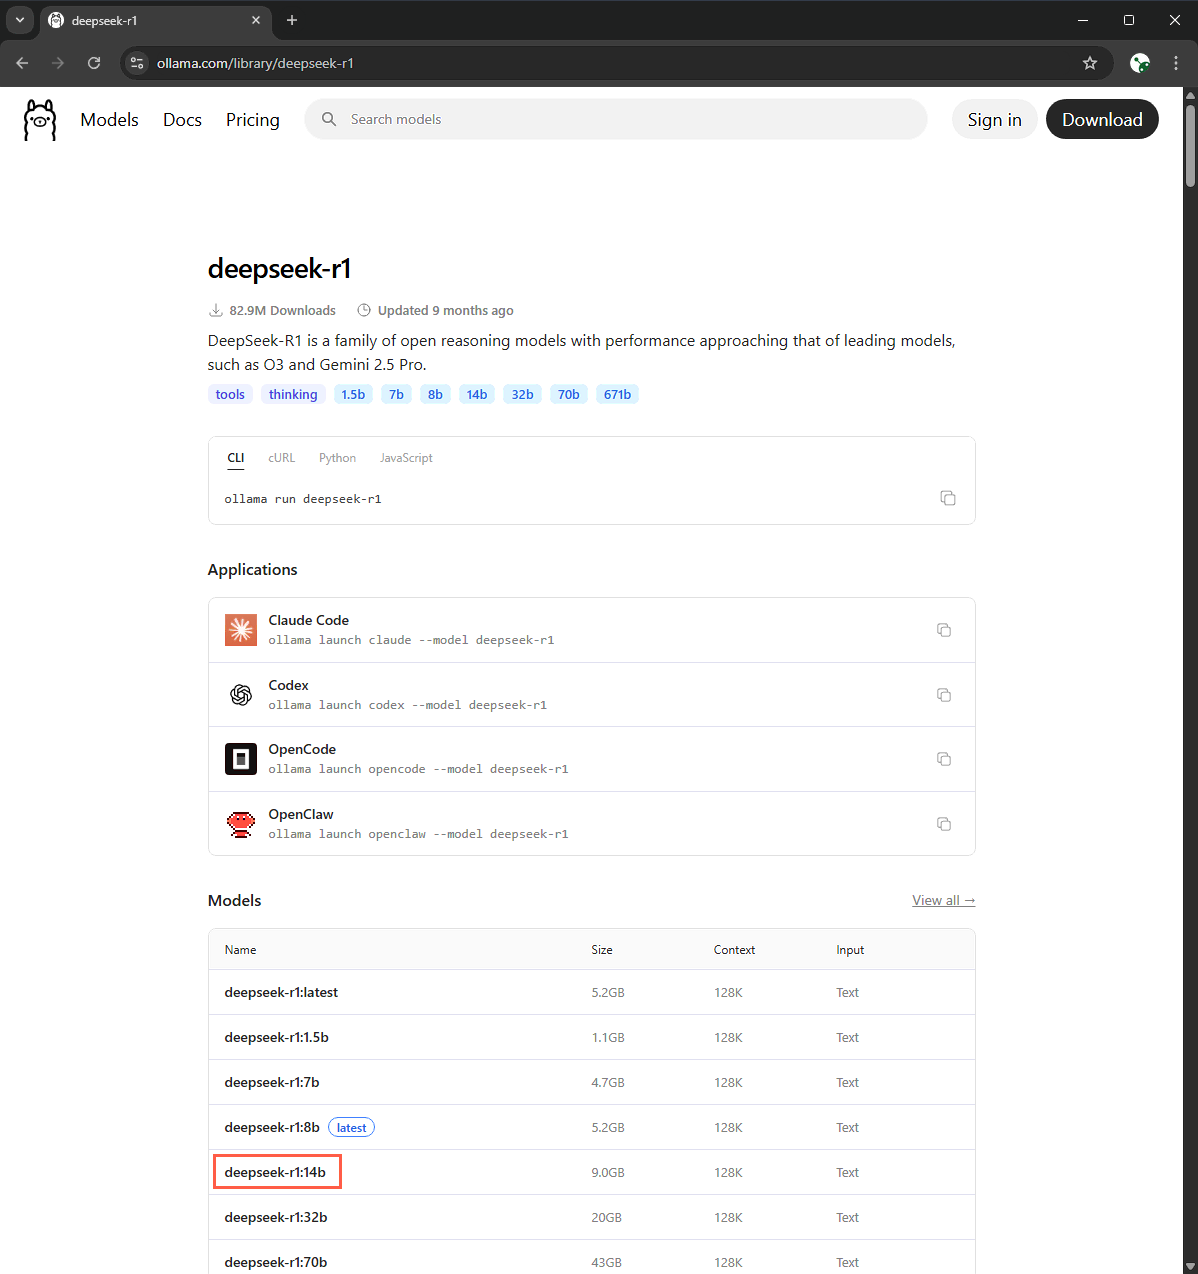
Instead of Llama 3.2—say you want to use the DeepSeek R1 model with 14 billion parameters instead (models with more parameters generally are more capable but heavier). Go to ollama.com/library. In the Search models type:
Browser
deepseek r1and hit Enter.
B.
Click the deepseek-r1 model, scroll down and click on the deepseek-r1:14b model.
Note: this model requires 9GB of disk space (and at least 12GB of RAM). It has more parameters than the default model (the one with latest tag) i.e. deepseek-r1:8b.
C.
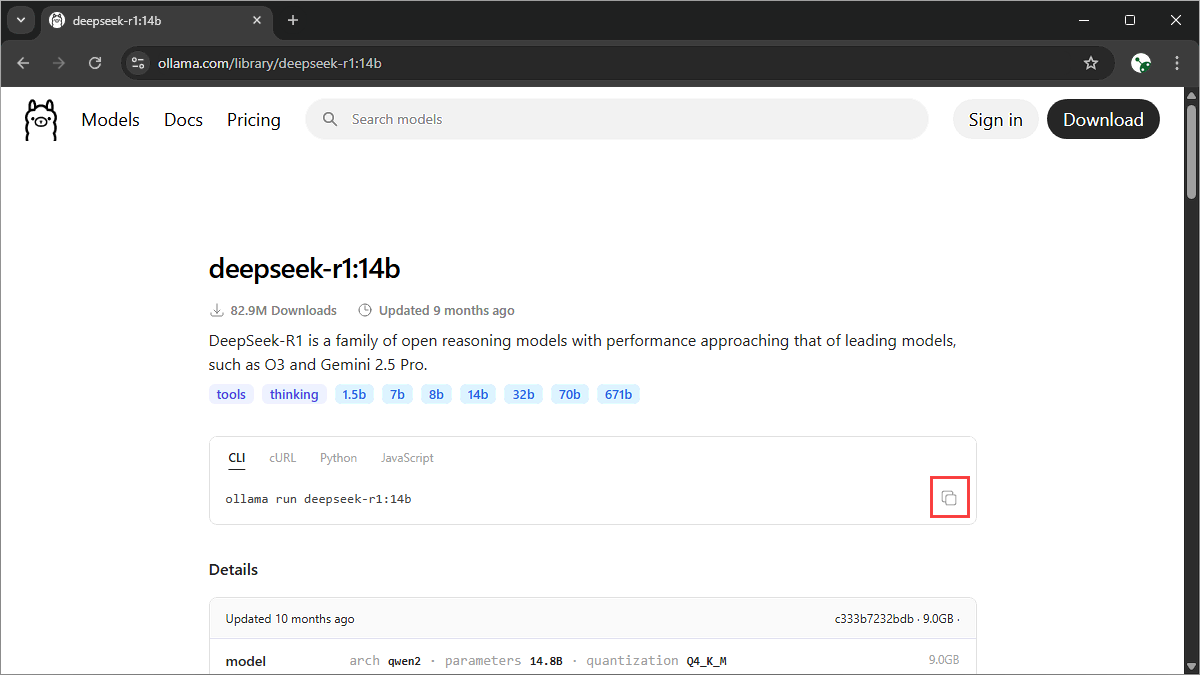
Copy the “run” command.
D.
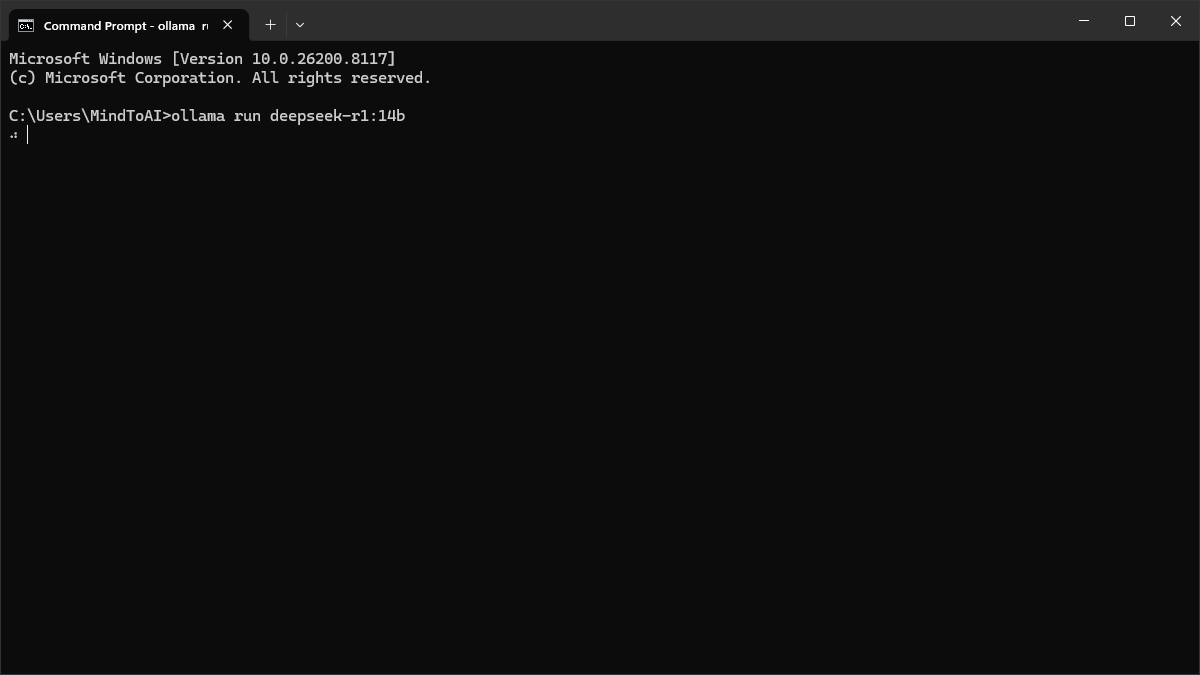
Paste it into your Command Prompt:
Command Prompt
ollama run deepseek-r1:14band hit Enter.
Note: If you do not specify the 14b parameters, Ollama by default will pick the latest model (deepseek-r1:8b).
E.
Once download is completed, you can now switch between the DeepSeek-r1 14b and Llama 3.2 models from the Open WebUI.
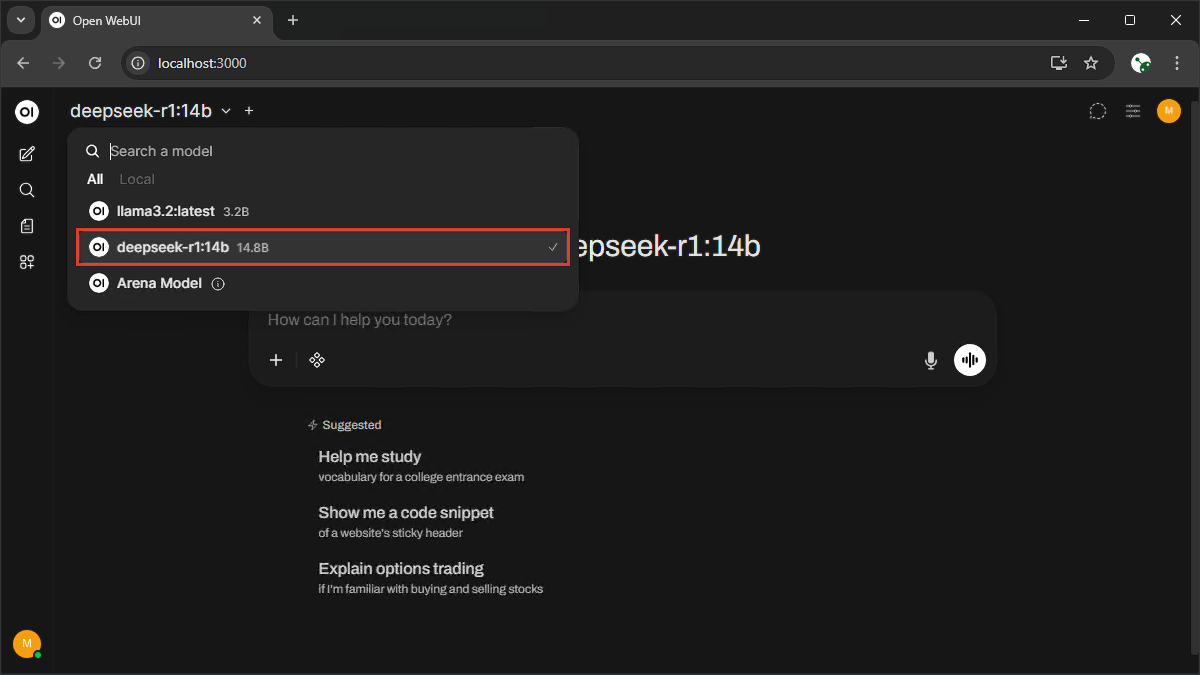
Note that the larger the model’s parameters, the bigger the file size and resource usage.
Step 7 – Adjust response style
By default, AI responds in a neutral tone, but you can define how it behaves by setting a system prompt.
A.
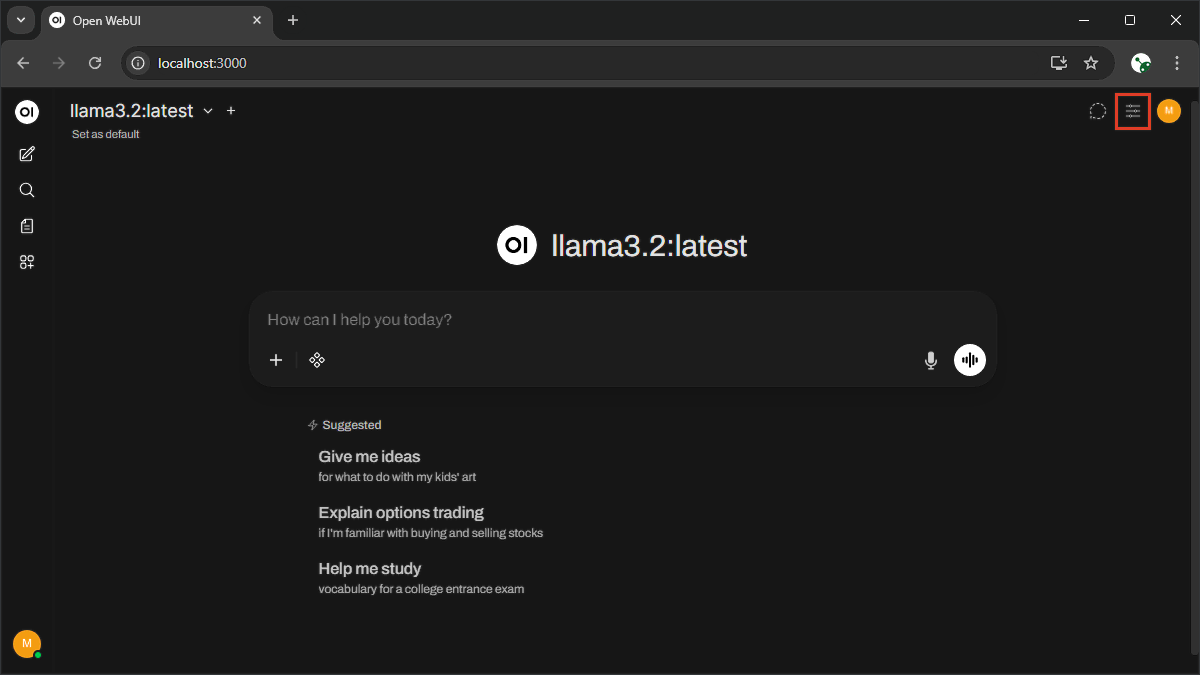
Click the Controls button (second from the right) in the top right corner of your Open WebUI window.
B.
In the System Prompt enter the style you want the AI to respond. Try a few styles so you can compare the outputs. For example:
Minimalist style
Open WebUI
You are a minimalist assistant. Answer in 20 words or less. No greetings, no fluff—just the facts.Storyteller style
Open WebUI
You are a creative storyteller. Respond using fun analogies and emojis. Start your response with 'Once upon a time...'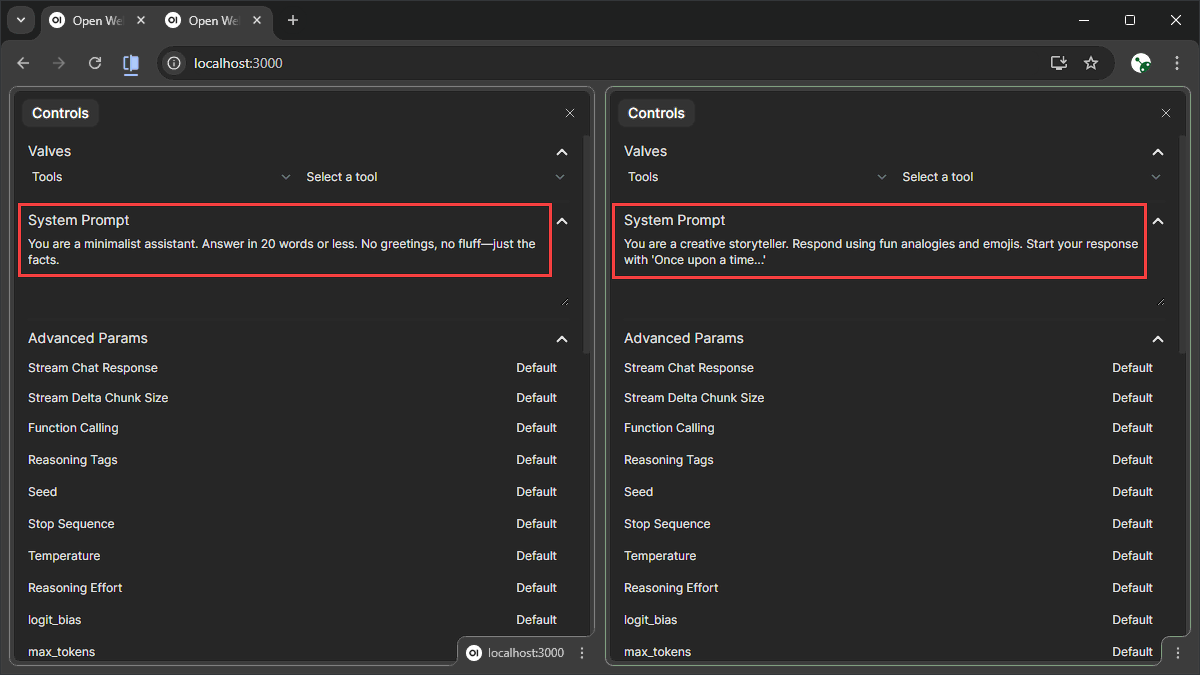
C.
Type a prompt:
Open WebUI
Why the ocean is salty?then hit Enter. Notice the different style of response you get from each system prompt.
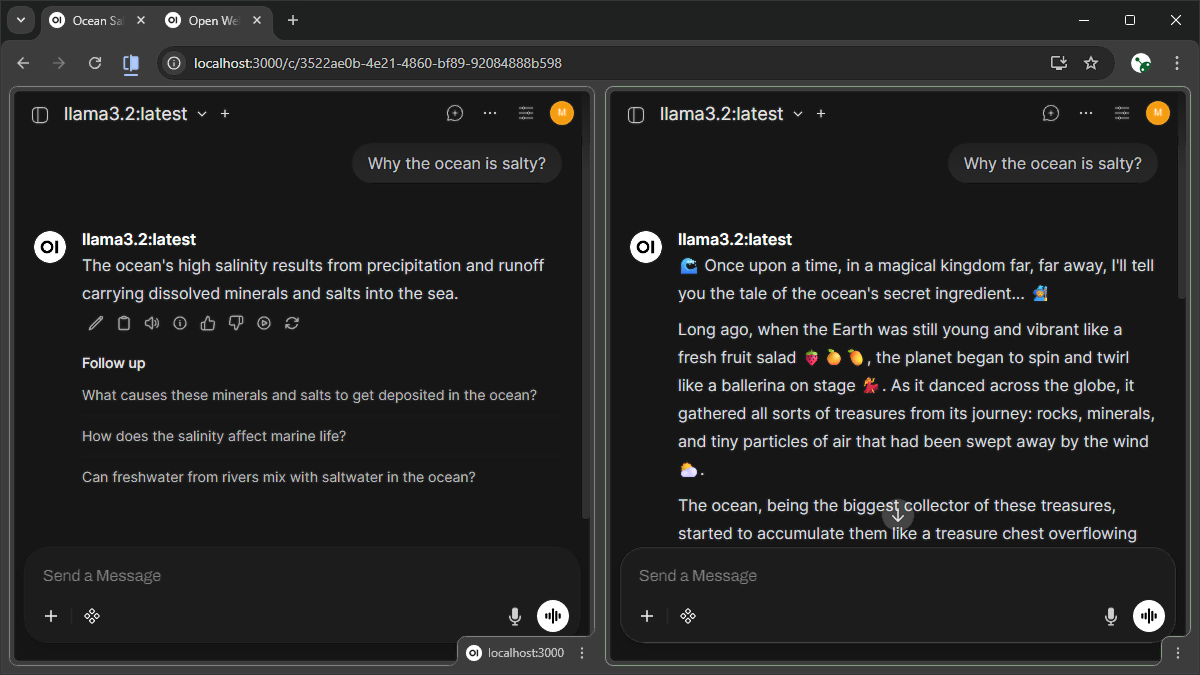
You can also control responses directly by how you write your prompt—check the Prompt Building article for more details on prompting techniques.
Common Issues & Fixes
Here are common issues and how to fix them.
Ollama Issues
●
Model download is very slow
Models are large (several GB); check internet or try smaller models.
●
Model won’t run / Out of memory
Use a smaller model (e.g. llama3.2) or close other apps.
●
Slow responses
Normal without GPU; use smaller models for better speed.
Docker/Open WebUI Issues
●
Cannot access Open WebUI
Ensure Docker Desktop displays Engine running status.
●
Port already in use
Restart your PC or change the port in Docker settings.
What’s Next?
You’ve just completed the second part of the beginner’s guide series.
You now have your own private AI chat locally run on your own computer—no cloud, no tracking, fully under your control.
Start simple. Try different prompts, explore different models, and see what works best for your needs.
Once comfortable, you can learn how to further improve your prompting techniques.
Continue to Part 3 below.
This is the second part of the beginner’s guide series.
Read part 1: How to use AI: The 3 Practical Purposes of Generative AI
Read part 3: Prompt Building: Master the Art of Talking to AI
Read part 4: Create Your Own AI Assistant: Customizing for Productivity